
Author: Mike McBrien
-

Anti-Optimization Zones: When Bad UX Creates Better Conversions
The Paradox of Perfect Optimization in Anti-Optimization Zones In the relentless pursuit of frictionless user experiences, we’ve created a generation of websites so smooth that users glide through them without truly engaging. Click, scroll, purchase, forget. But what if the very friction we’ve spent years eliminating is sometimes the key to creating meaningful, high-value conversions?…
-
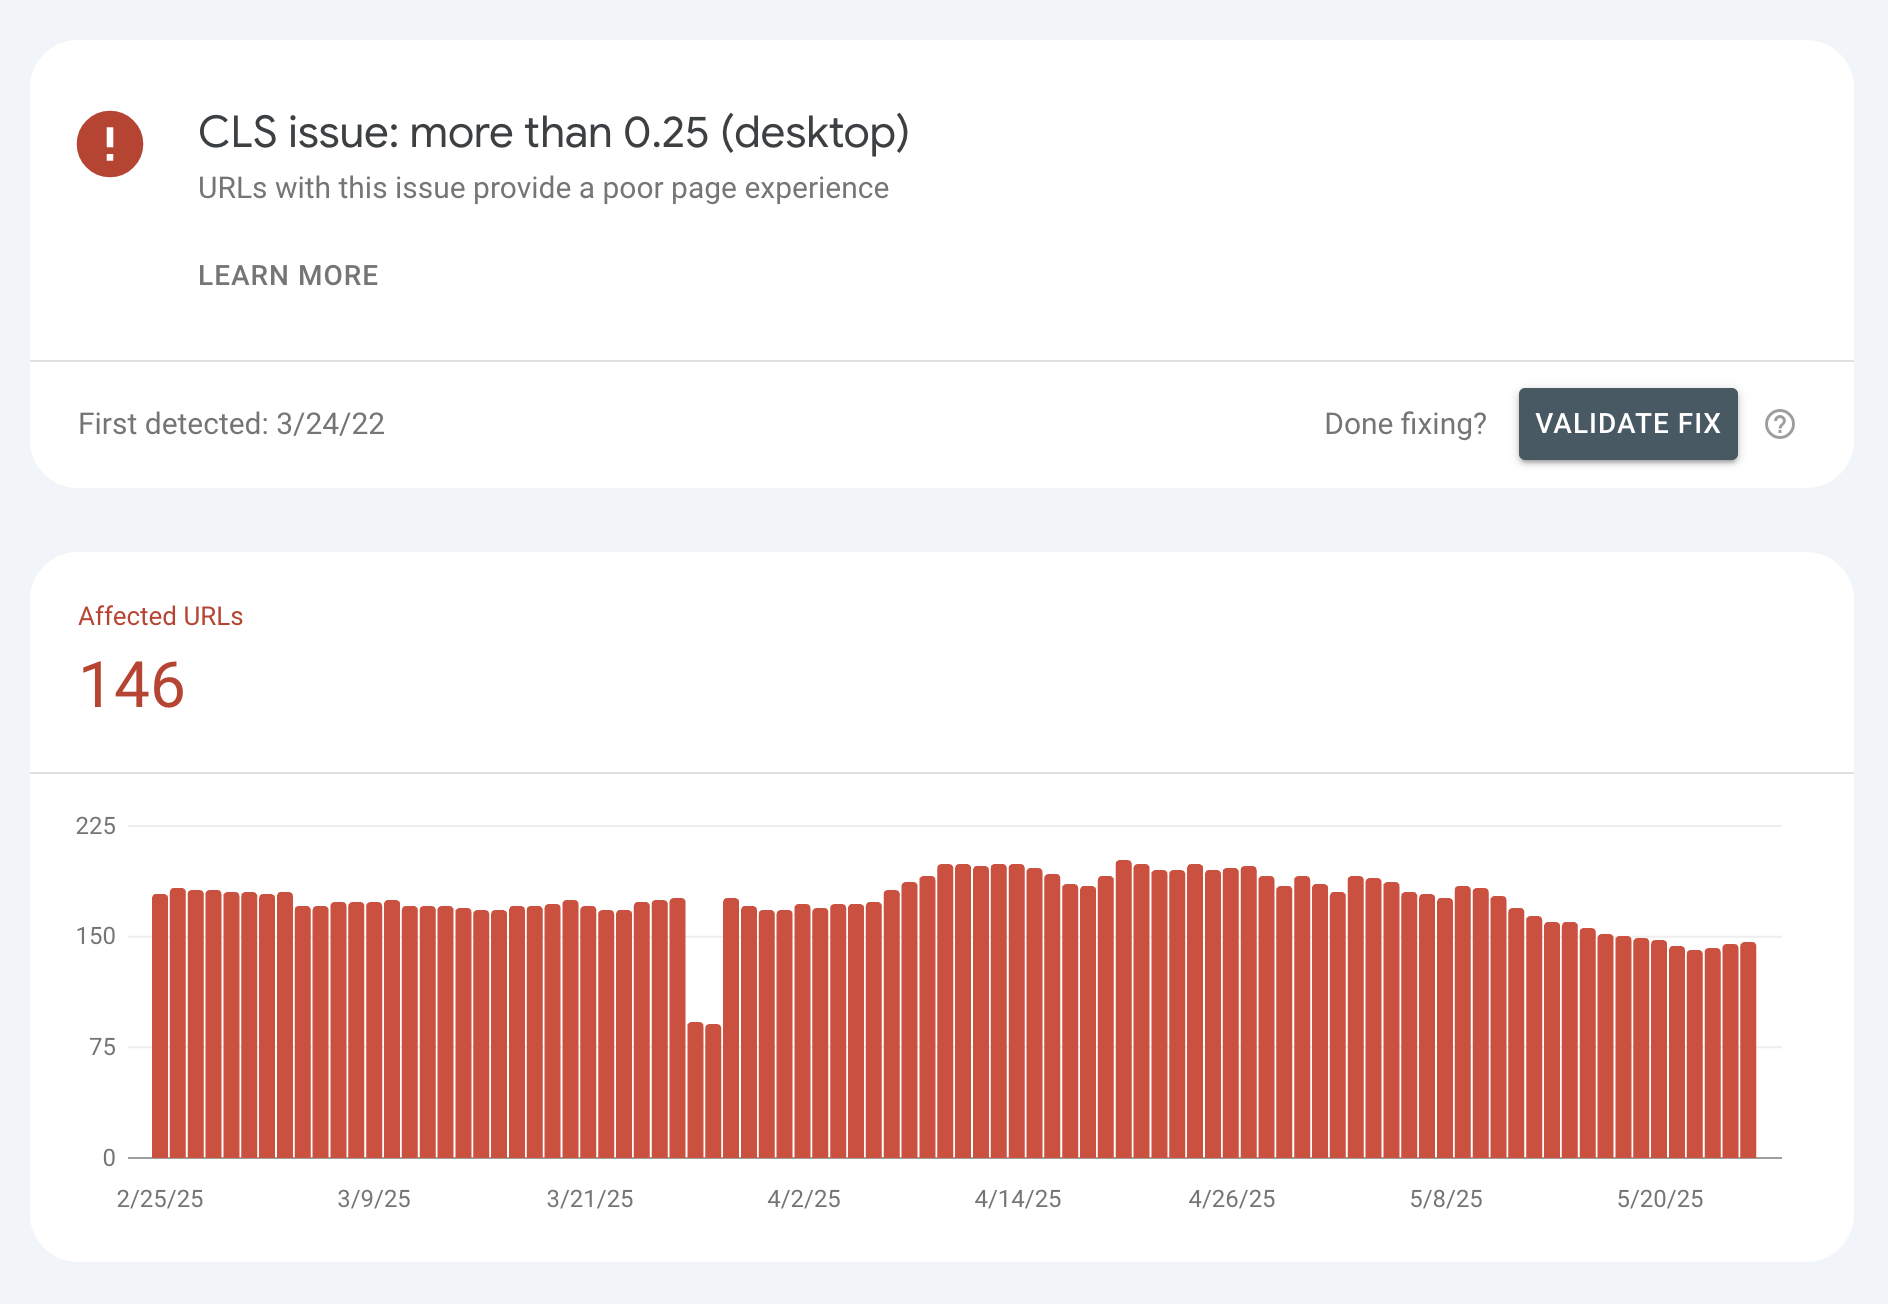
Why Your Perfect PageSpeed Score Won’t Save Your Rankings (And What Google Actually Cares About)
Spoiler alert: That 100/100 PageSpeed Insights score you’ve been chasing? It might be costing you rankings. Last week, I watched a client spend $15,000 optimizing their site to achieve a 95+ PageSpeed Insights score. Their bounce rate increased by 23%. Their conversions dropped by 18%. And their organic traffic? Down 12% within a month. Meanwhile,…
-
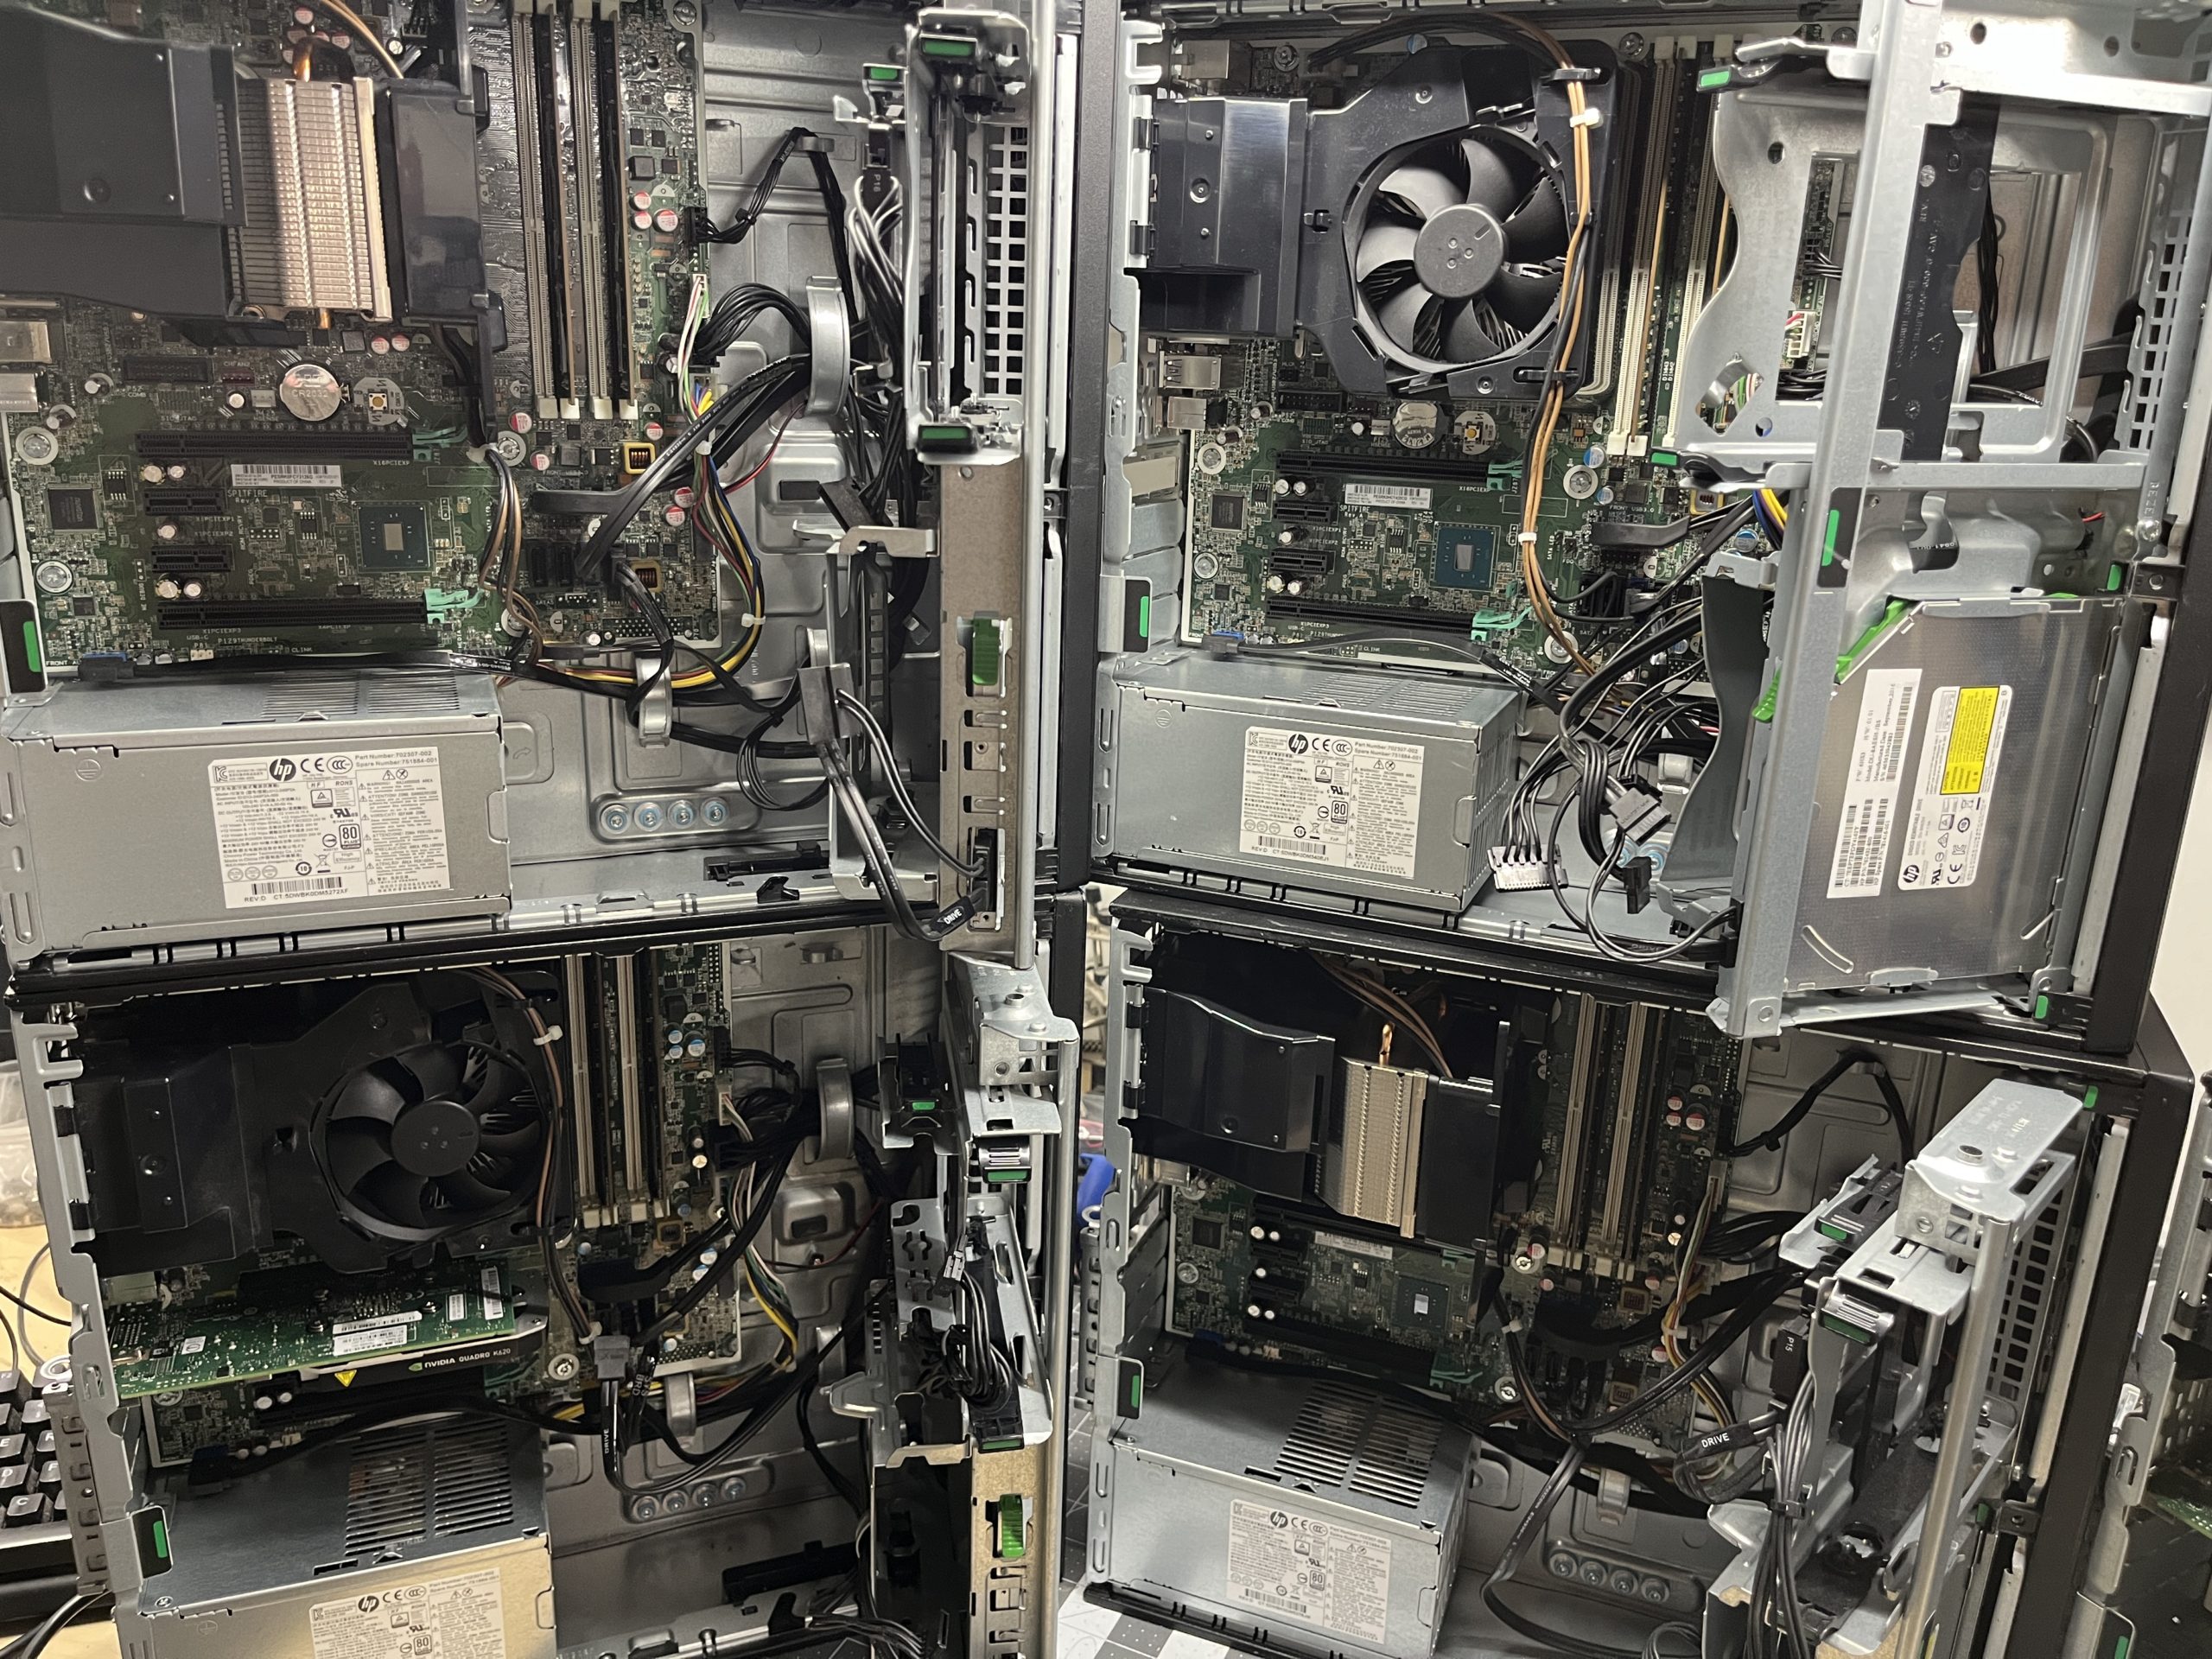
HP Z240 SFF: The Best Value For Your Home Lab
I recently purchased five HP Z240 SFF workstations from eBay to set up a local server farm for Kubernetes, Docker Swarm, and other homelab projects. After spending considerable time researching and comparing options, I found these machines hit a remarkable sweet spot in terms of size, power, and most importantly, price. These workstations, while now…
-

Empowering Your Development Team: The Art of Guiding Without Solving
After 20+ years in full-stack web development and DevOps, I’ve learned that one of the most valuable things I can do as a leader isn’t solving problems for my team—it’s teaching them how to solve problems themselves. The Challenge of Stepping Back When a developer on your team encounters an issue with their Docker container…
-

Conversion Decay Engineering: The Strategic Art of Losing Customers to Win
Understanding Conversion Decay Engineering: A Radical Approach to Growth In the relentless pursuit of growth, we’ve been conditioned to fight tooth and nail for every percentage point of conversion rate. But what if the path to sustainable business growth involves deliberately letting some conversions slip away? Enter Conversion Decay Engineering – the strategic practice of…
-

The Art of Remote Dev Team Leadership: Setting Clear Expectations and Managing Roles
Leading remote development teams comes with special challenges. You need to think carefully about how you lead, communicate, and organize your team. In my years of managing remote tech teams, I’ve found that success depends on being clear about what you expect, who does what, and how things get done. Building Trust First Trust is…
-
The WordPress Architect’s Guide to Headless WordPress
Introduction After two decades in the WordPress ecosystem, I’ve witnessed numerous evolutionary leaps—from the introduction of custom post types to the paradigm shift of Gutenberg. Yet none has offered more transformative potential than the headless approach. Decoupling WordPress’s content management capabilities from its presentation layer represents not merely a technical variation but a fundamental reimagining…
-
Enhancing Your Toolset with Modern PHP Features
In the ever-evolving landscape of web development, staying adaptable is key to delivering efficient and innovative solutions. This blog explores how embracing modern PHP features can enhance your coding experience, making your work not only effective but also enjoyable. 1. First-Class Callables in PHP (PHP 7.4 & Up) One of the most significant advancements in…
-

Setting Rates and Business Models for WordPress Architects
This is the final post in our three-part series on “The Business of WordPress Architecture,” where we explore the professional aspects of being a WordPress Architect beyond just the technical skills. Introduction After exploring client relationships and project management in the previous posts, we now arrive at what many consider the most challenging aspect of…
-
Project Management and Team Leadership for WordPress Architects
This is the second post in our three-part series on “The Business of WordPress Architecture,” where we explore the professional aspects of being a WordPress Architect beyond just the technical skills. Introduction After two decades architecting WordPress solutions, I’ve come to recognize a fundamental truth: technical excellence alone doesn’t deliver successful projects. The most elegantly…