
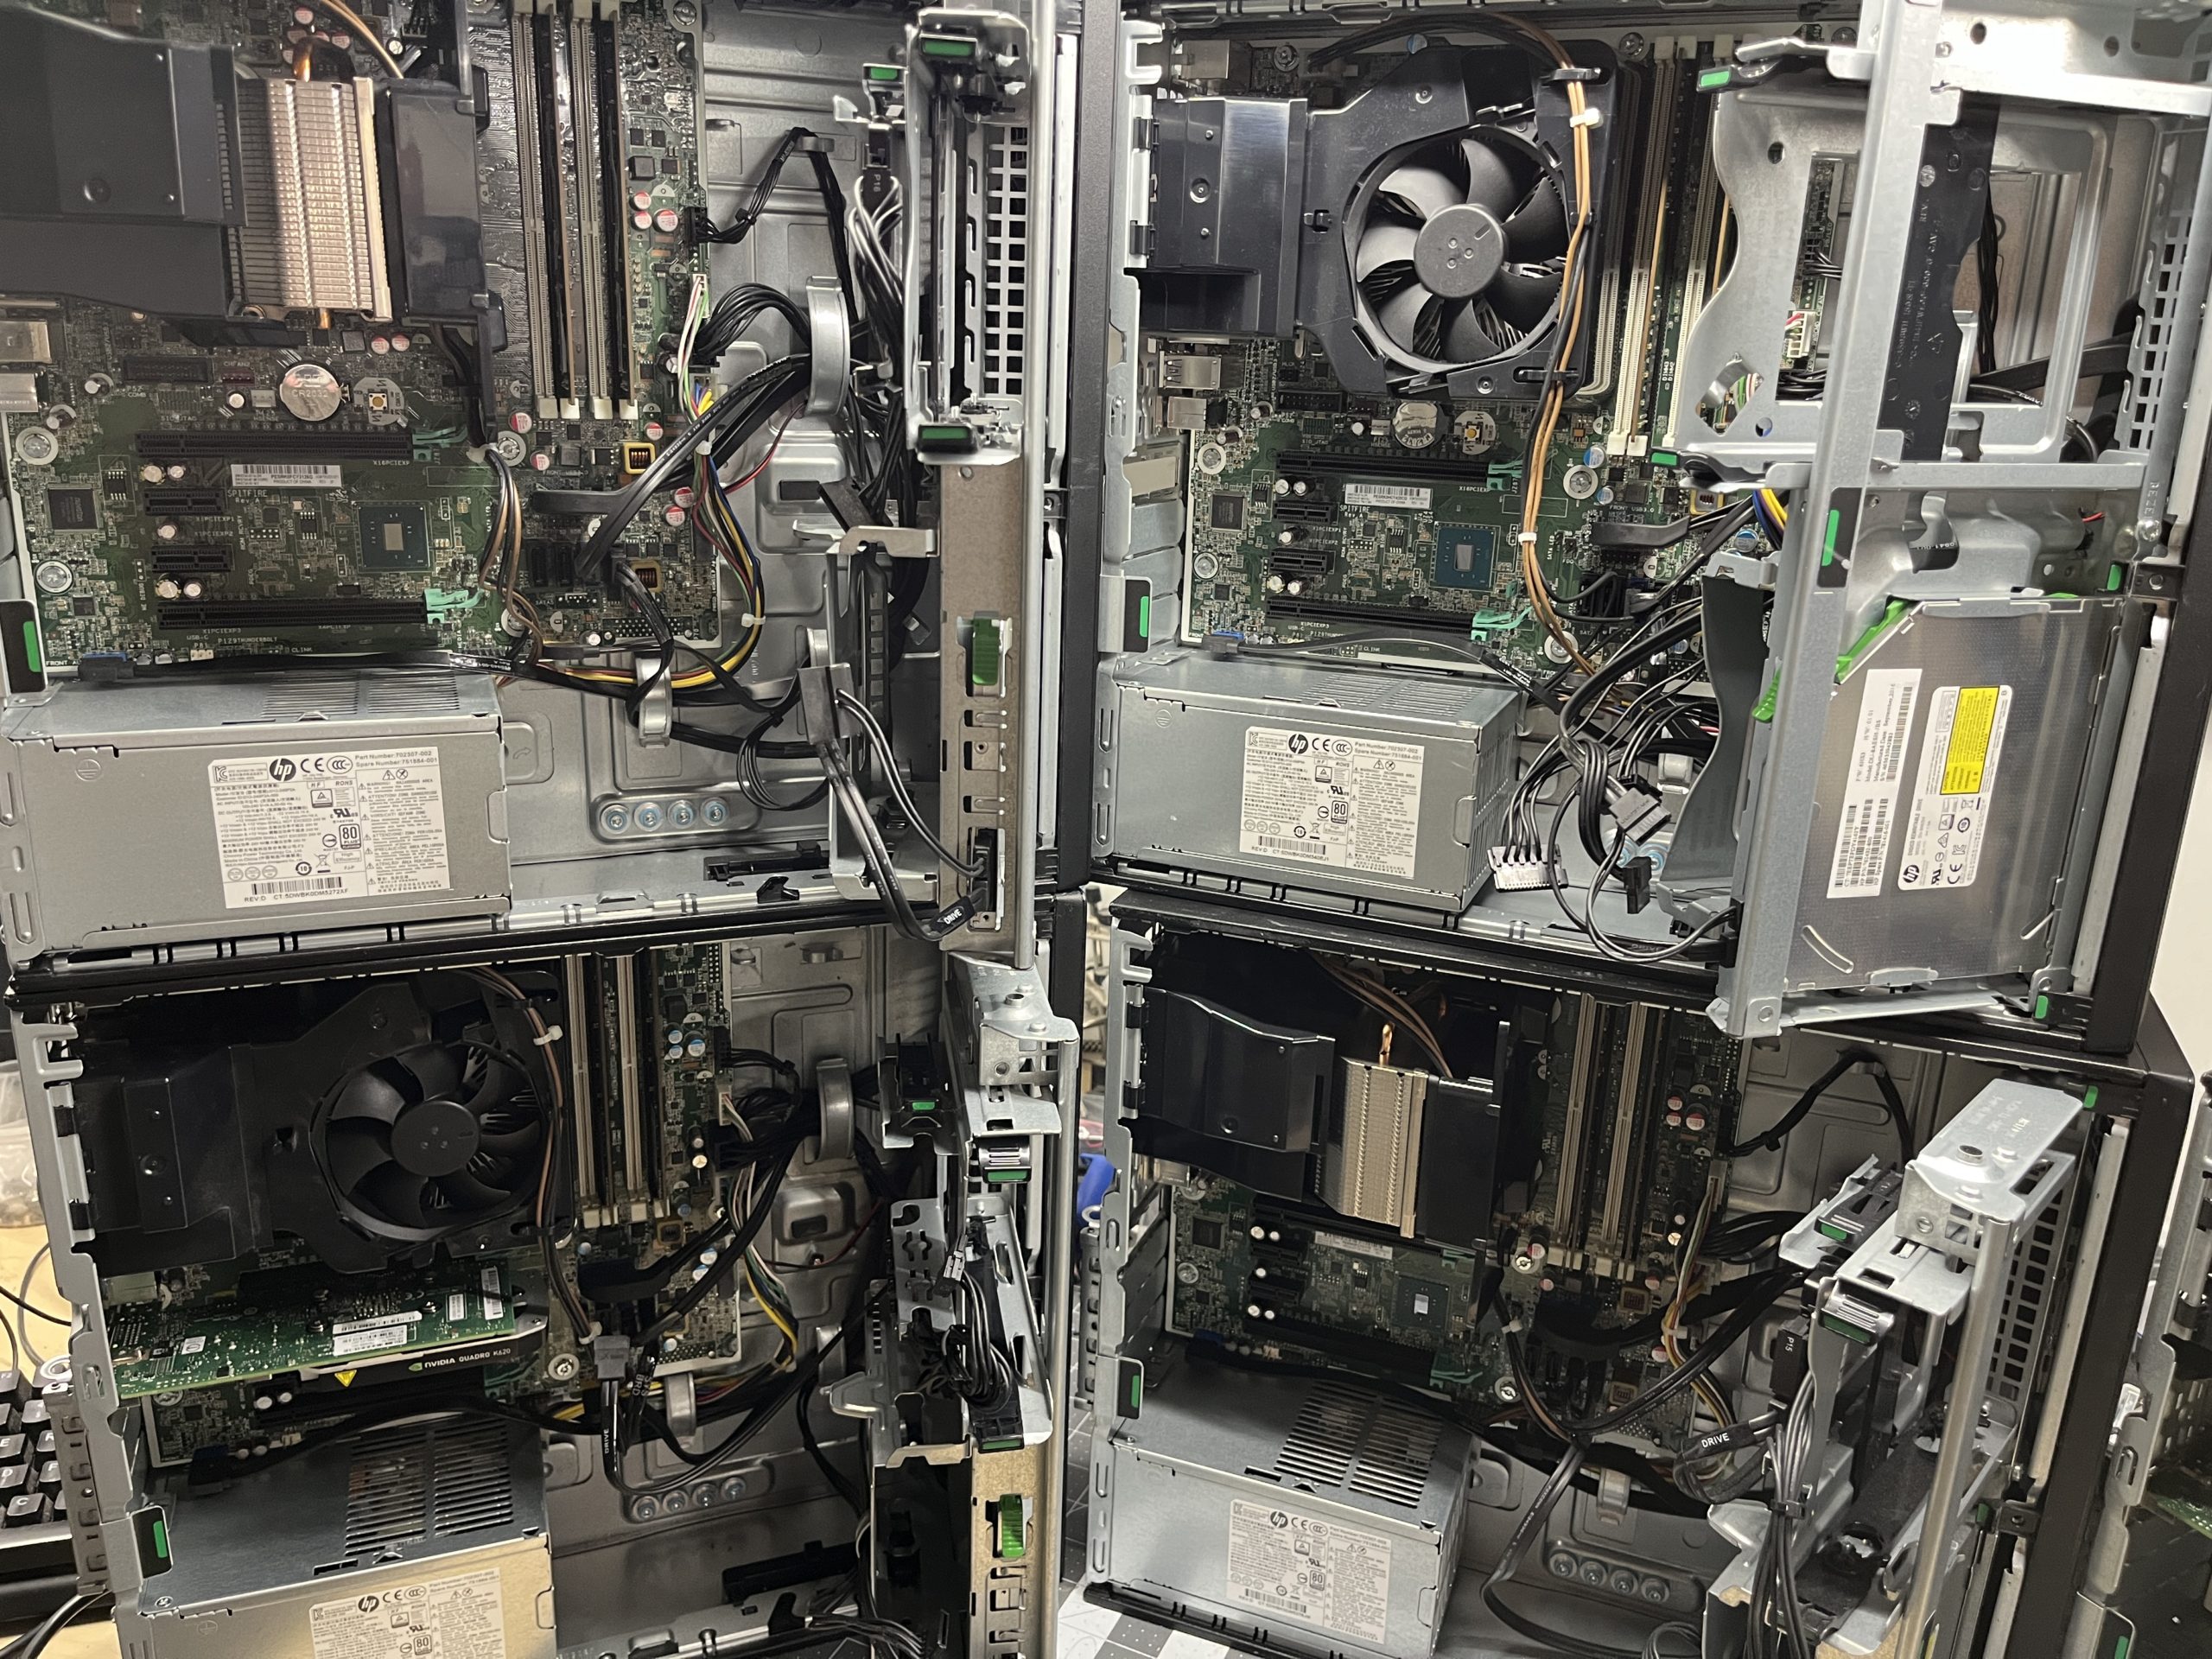
I recently purchased five HP Z240 SFF workstations from eBay to set up a local server farm for Kubernetes, Docker Swarm, and other homelab projects. After spending considerable time researching and comparing options, I found these machines hit a remarkable sweet spot in terms of size, power, and most importantly, price. These workstations, while now considered “older hardware” in the enterprise world, represent an exceptional opportunity for homelab enthusiasts to build professional-grade setups at a fraction of the cost of new equipment.
This deep dive will explore why the HP Z240 SFF deserves serious consideration for your next homelab project, with detailed comparisons to popular Dell alternatives and practical advice for getting the most value when purchasing these systems.
As an eBay partner, I may earn commission from qualifying purchases through links on this page.
Understanding the Value of “Older” Enterprise Hardware
Before diving into the specific advantages of the HP Z240 SFF, it’s worth considering why “older” enterprise hardware often represents the best value for homelab enthusiasts. Enterprise-grade systems like the Z240 are built to significantly higher standards than consumer hardware. They’re designed for 24/7 operation in mission-critical environments, with extensive testing, higher-quality components, and better reliability engineering.
When these systems reach their 3-5 year refresh cycle in corporate environments, they flood the secondary market at steep discounts. This creates a golden opportunity for homelab builders to acquire professional-grade hardware that still has many years of reliable service left at a fraction of its original cost.
The Perfect Balance of Performance and Value
When building a homelab, especially for container orchestration like Kubernetes, you need machines that offer adequate processing power, sufficient memory, and reliable operation without consuming excessive electricity or space. The HP Z240 SFF strikes this balance exceptionally well.
The Z240 is officially HP’s entry-level workstation, but don’t let that designation fool you. These machines pack serious capabilities that rival much more expensive options while maintaining a compact form factor that’s only slightly larger than comparable Dell SFF PCs. Released in 2015-2016, these workstations represented a significant leap forward in the capabilities of small form factor systems, particularly with their support for newer technologies like DDR4 and NVMe storage.
Key Advantages of the HP Z240 SFF
1. Newer Generation CPUs at Affordable Prices
One of the most compelling reasons to choose the Z240 over alternatives like the Dell Optiplex 9010/7010 series is the processor generation. My Z240 units came with Intel Core i7-6700 processors (Skylake architecture, 6th generation), which offer significant improvements over the older i7-3770 (Ivy Bridge, 3rd generation) found in the Dell 9010 or the i7-4770 (Haswell, 4th generation) in the Dell 9020.
The architectural improvements from Ivy Bridge to Skylake are substantial:
- Improved IPC (Instructions Per Clock): Skylake delivers approximately 20-25% better performance per clock cycle compared to Ivy Bridge
- Better integrated graphics: While not essential for server workloads, the improved Intel HD Graphics 530 in the i7-6700 can be useful for occasional GUI use
- Enhanced power management: More efficient power states and thermal design
- DDR4 memory support: Enabling higher memory capacities and bandwidth
- Native USB 3.1 support: Providing faster peripheral connections
The Skylake processors not only deliver better performance but also significantly improved power efficiency. This is crucial for a homelab that will be running 24/7, as the energy savings can add up substantially over time. In my testing, the Z240 with an i7-6700 typically draws 15-20% less power under equivalent loads compared to a Dell 9010 with an i7-3770, despite delivering better performance.
The i7 Advantage: Cores and Threads Matter
When shopping for a Z240 or any SFF system for your homelab, I strongly recommend focusing on models with Intel Core i7 processors rather than i5 or i3 variants. The i7 models offer:
- Double the thread count: 8 threads vs. 4 threads in most i5 models
- Larger cache: Typically 8MB vs. 6MB in i5 models
- Higher clock speeds: Both base and turbo frequencies
- Hyperthreading: Critical for running multiple VMs or containers
The price difference between i5 and i7 models on the secondary market is often minimal (sometimes just $20-50), making the i7 variants a substantially better value for homelab use. Those extra threads make a tremendous difference when running multiple virtual machines or containers.
2. Impressive Memory Capacity: The 64GB Game-Changer
Perhaps the most significant advantage of the Z240 SFF for homelab use is its support for up to 64GB of DDR4 RAM (using 4 x 16GB DIMMs). This is a massive leap over the 32GB maximum in many Dell Optiplex systems of comparable age. For container orchestration or virtualization workloads, this additional memory can be the difference between a smooth-running environment and constant memory pressure.
Memory is the lifeblood of virtualization and containerization. While you can compress CPU workloads or optimize storage access patterns, insufficient RAM directly limits how many workloads you can run simultaneously. The 64GB capacity of the HP Z240 allows you to run:
- A full Kubernetes control plane with multiple worker nodes
- Several database instances with reasonable buffer pools
- Development environments for multiple applications
- Monitoring and logging infrastructure
- All simultaneously on a single machine
The transition to DDR4 also provides higher bandwidth and lower power consumption compared to the DDR3 memory used in older Dell systems.
RAM Purchasing Strategy
When shopping for HP Z240 systems, I recommend prioritizing units that already come with at least 16GB of RAM, and ideally 32GB if your budget allows. While adding RAM later is certainly an option, the economics often favor buying systems with RAM already installed:
- Corporate sellers often don’t adjust prices proportionately to installed RAM
- The included RAM has already been tested with the specific system
- You avoid the hassle of sourcing compatible modules
- The total cost is typically lower than buying RAM separately
That said, if you find an exceptional deal on a system with minimal RAM, the Z240 uses standard DDR4 DIMMs that are readily available. Just ensure you purchase ECC modules if you have a Xeon-based system and intend to use ECC functionality.
3. Xeon Options with ECC Support: Enterprise Reliability
For those requiring even more reliability, the Xeon E3-1245 V5 version of the Z240 supports ECC (Error-Correcting Code) memory. What’s particularly useful is that these Xeon versions support both ECC and non-ECC RAM, giving you flexibility in your memory configuration.
The Intel Xeon E3-1245 V5 is actually very similar to the i7-6700 in terms of core count and performance, but adds:
- ECC memory support for detecting and correcting memory errors
- Slightly higher base clock (3.5GHz vs. 3.4GHz)
- Support for some additional instruction sets
- Better validation and reliability testing
ECC memory provides protection against random bit flips in RAM, which can cause silent data corruption or system crashes. While these errors are relatively rare in home environments, they become increasingly probable when running 24/7 with high memory utilization. For critical workloads or learning environments where stability is paramount, the Xeon variants offer meaningful advantages.
4. NVMe SSD Support: Breaking the Storage Bottleneck
Modern computing workloads, especially in containerized environments, demand fast storage. The Z240 delivers with M.2 NVMe SSD support, offering a transformative upgrade from SATA-based SSDs:
- Sequential read speeds: Up to 3500MB/s vs. ~550MB/s for SATA SSDs
- Sequential write speeds: Up to 2500MB/s vs. ~520MB/s for SATA SSDs
- IOPS (Input/Output Operations Per Second): Typically 5-10x higher than SATA SSDs
- Lower latency: Typically under 20µs vs. 100µs+ for SATA SSDs
For database workloads, container image pulls, and general system responsiveness, NVMe storage makes a substantial difference. The Z240’s support for these drives represents a major advantage over older SFF systems that are limited to SATA connections.
It’s worth noting that the NVMe mounting in the HP Z240 has some peculiarities. You’ll need the specific HP 826414-001 NVMe caddy and heatsink for proper installation. This special caddy includes:
- A custom bracket that attaches to the motherboard
- A thermal pad and heatsink to prevent throttling under sustained loads
- Secure mounting to prevent drive disconnection
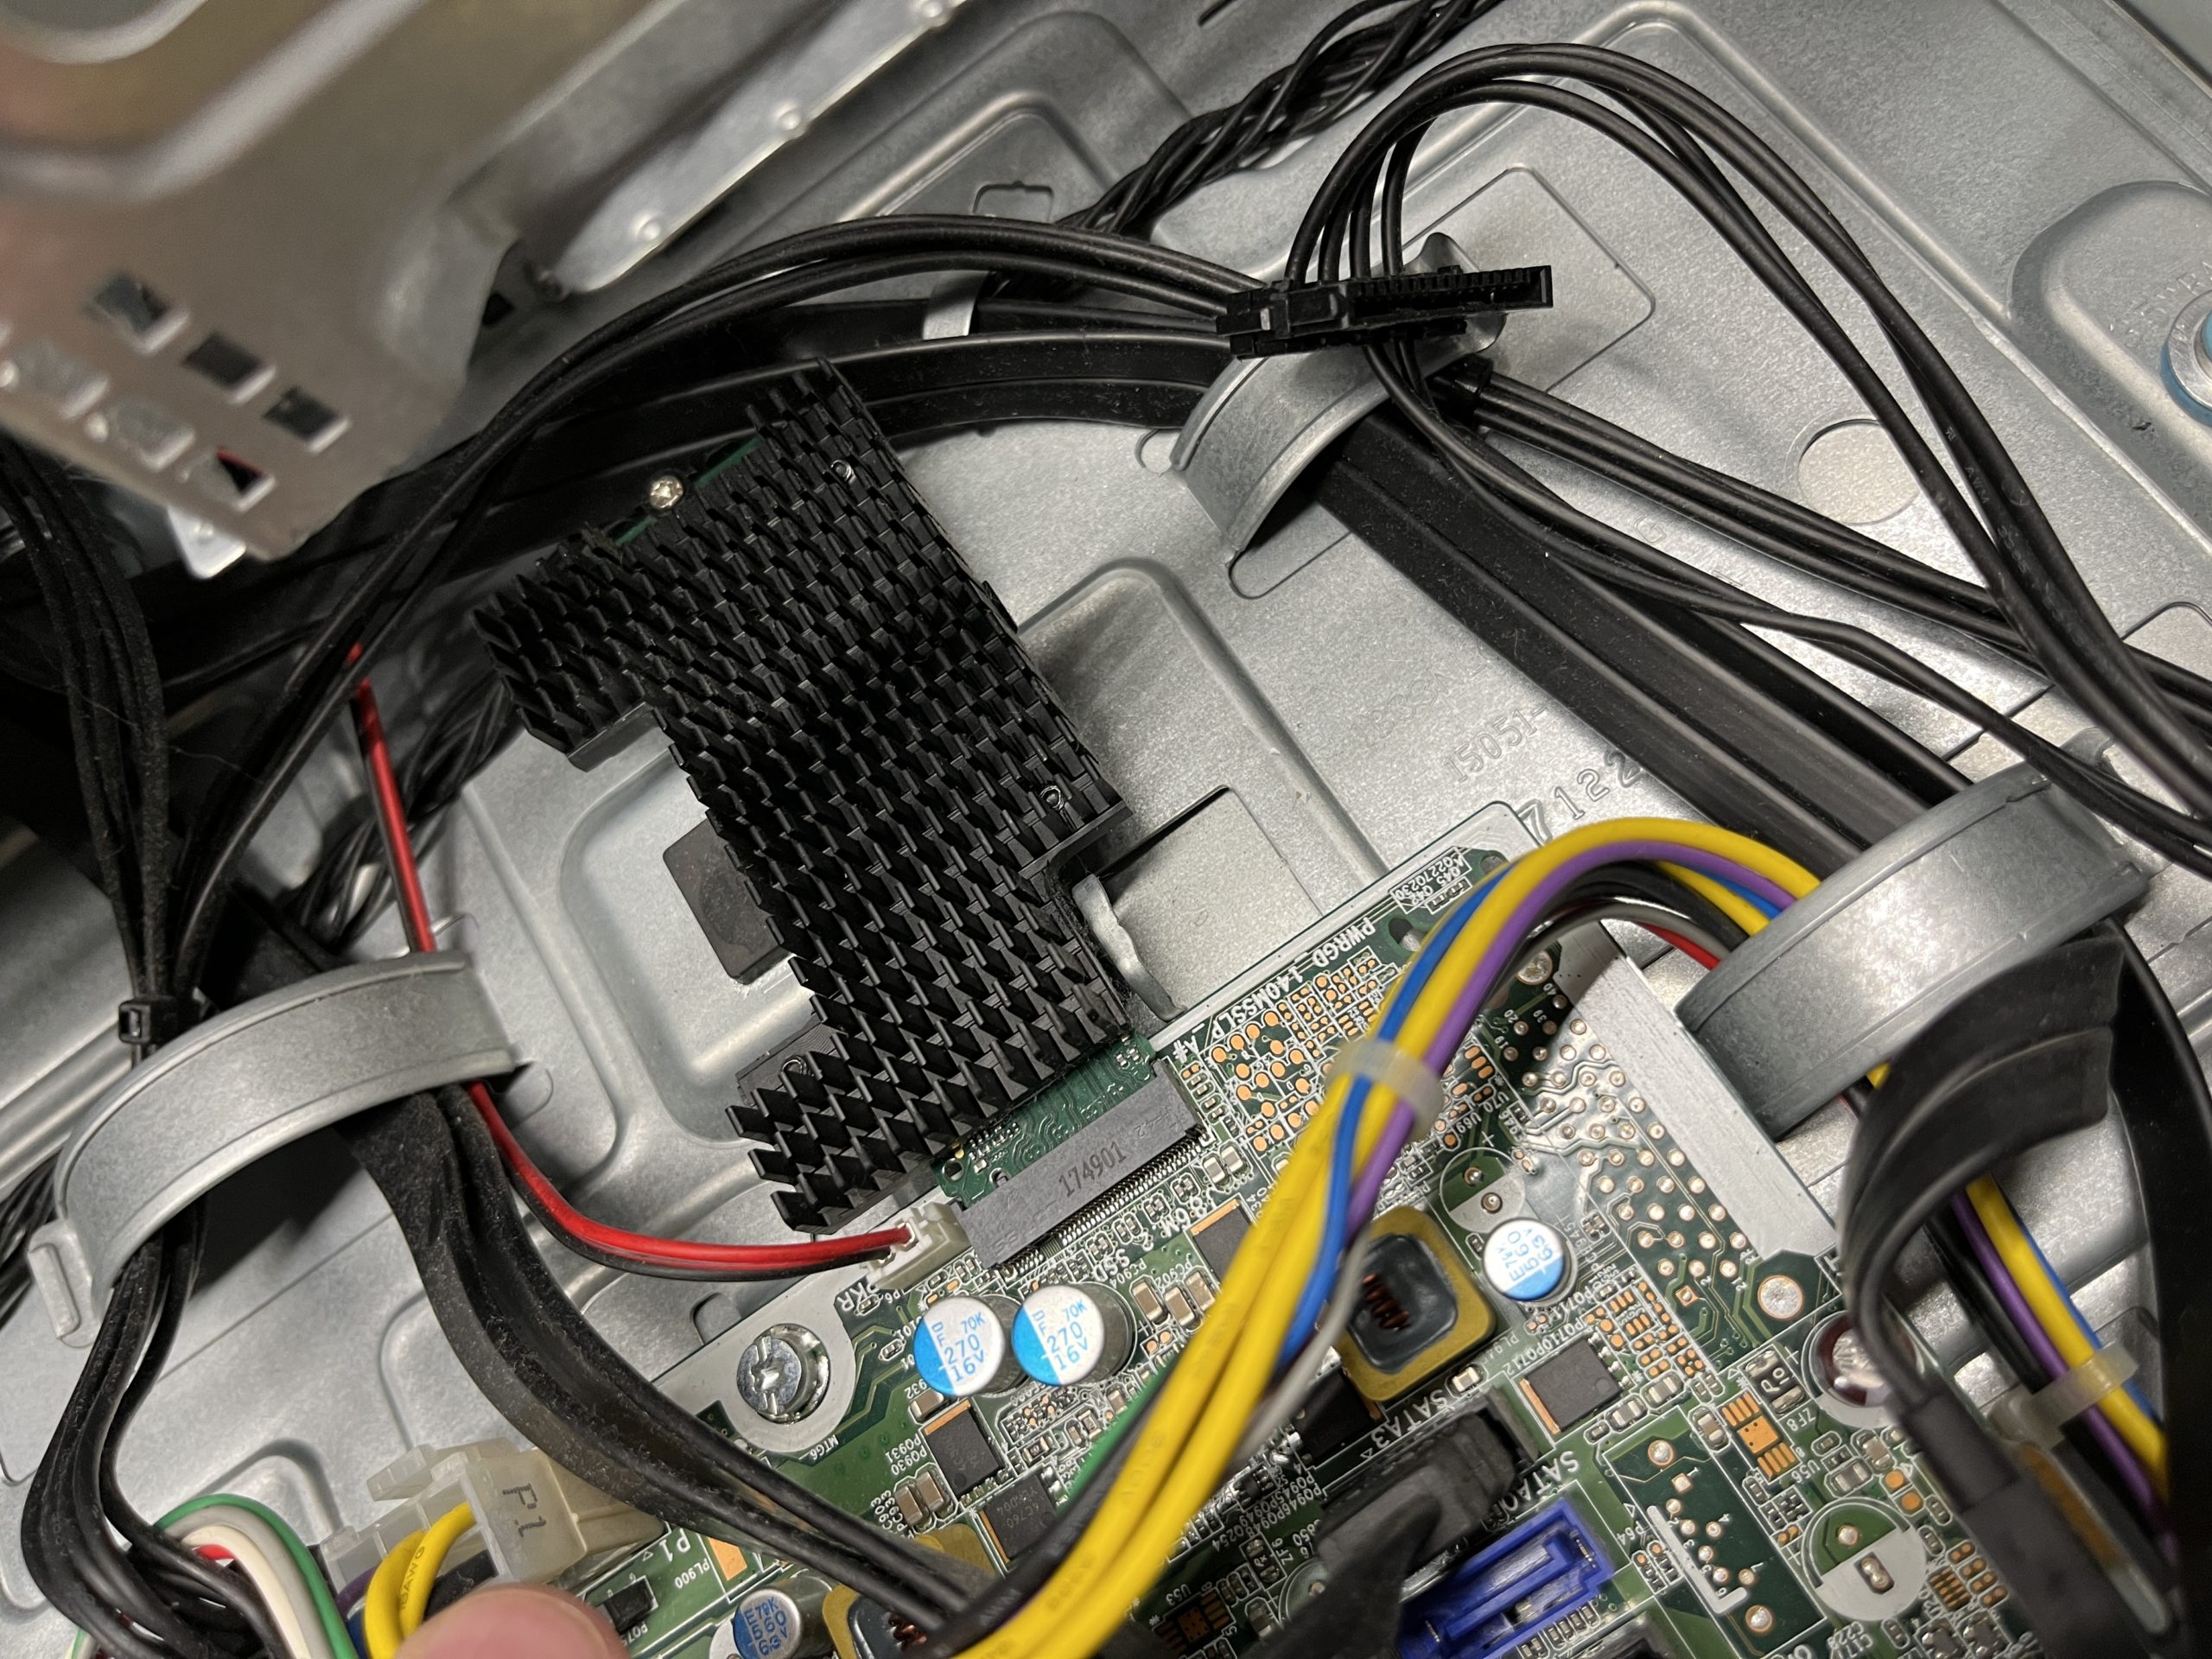
While this might seem like a minor inconvenience, the performance benefits are well worth it, especially for I/O-intensive applications like databases or container registries. These caddies can be found on eBay for around $15-25.
5. Generous Storage Options: Flexibility for Any Workload
The Z240 SFF provides remarkably versatile storage options with space for:
- 3-4 2.5″ SSDs or HDDs
- 2 traditional 3.5″ spinning disks (using available adapters)
- 4 SATA connectors on the motherboard
- 1 built-in M.2 slot for NVMe storage
- Additional NVMe drives via PCIe adapters
This flexibility allows you to implement sophisticated tiered storage solutions tailored to your specific needs:
- Tier 0: NVMe SSD for OS, container images, and performance-critical data
- Tier 1: SATA SSDs for frequently accessed data and secondary workloads
- Tier 2: Traditional HDDs for backups, archives, and bulk storage
For homelab Kubernetes environments, I typically recommend:
- A 512GB NVMe drive for the operating system and container images
- One or two 1TB SATA SSDs for persistent volumes and active data
- Optional 4TB+ HDDs for backups and large media collections
The ability to mix-and-match these storage options within a single system makes the HP Z240 exceptionally versatile for various homelab scenarios.
6. Better Display Handling for Headless Operation
A surprising but significant advantage of the Z240 over the Dell Optiplex series is its superior display handling. My Dell 9010 systems consistently fail to show BIOS or pre-Windows boot information over DisplayPort connections, which is incredibly frustrating when trying to troubleshoot issues without a dedicated monitor.
This might seem like a minor point, but for homelab use, it becomes critically important when:
- Performing initial setup of systems
- Troubleshooting boot issues
- Making BIOS changes
- Accessing recovery consoles
The Z240, in contrast, provides reliable video output during all boot stages across all display connections (VGA, DisplayPort, and HDMI with adapters), making remote management and troubleshooting much more practical.
7. Expansion Flexibility: Room to Grow
For users needing additional NVMe storage or specialized I/O, HP offers first-party NVMe PCI adapters (HP 742006-002 MS-4365 REV 1.1) that work perfectly with these systems. These adapters provide:
- An additional M.2 slot for NVMe storage
- Native PCIe 3.0 x4 connection (up to 32Gbps bandwidth)
- Compatible mounting and thermal design
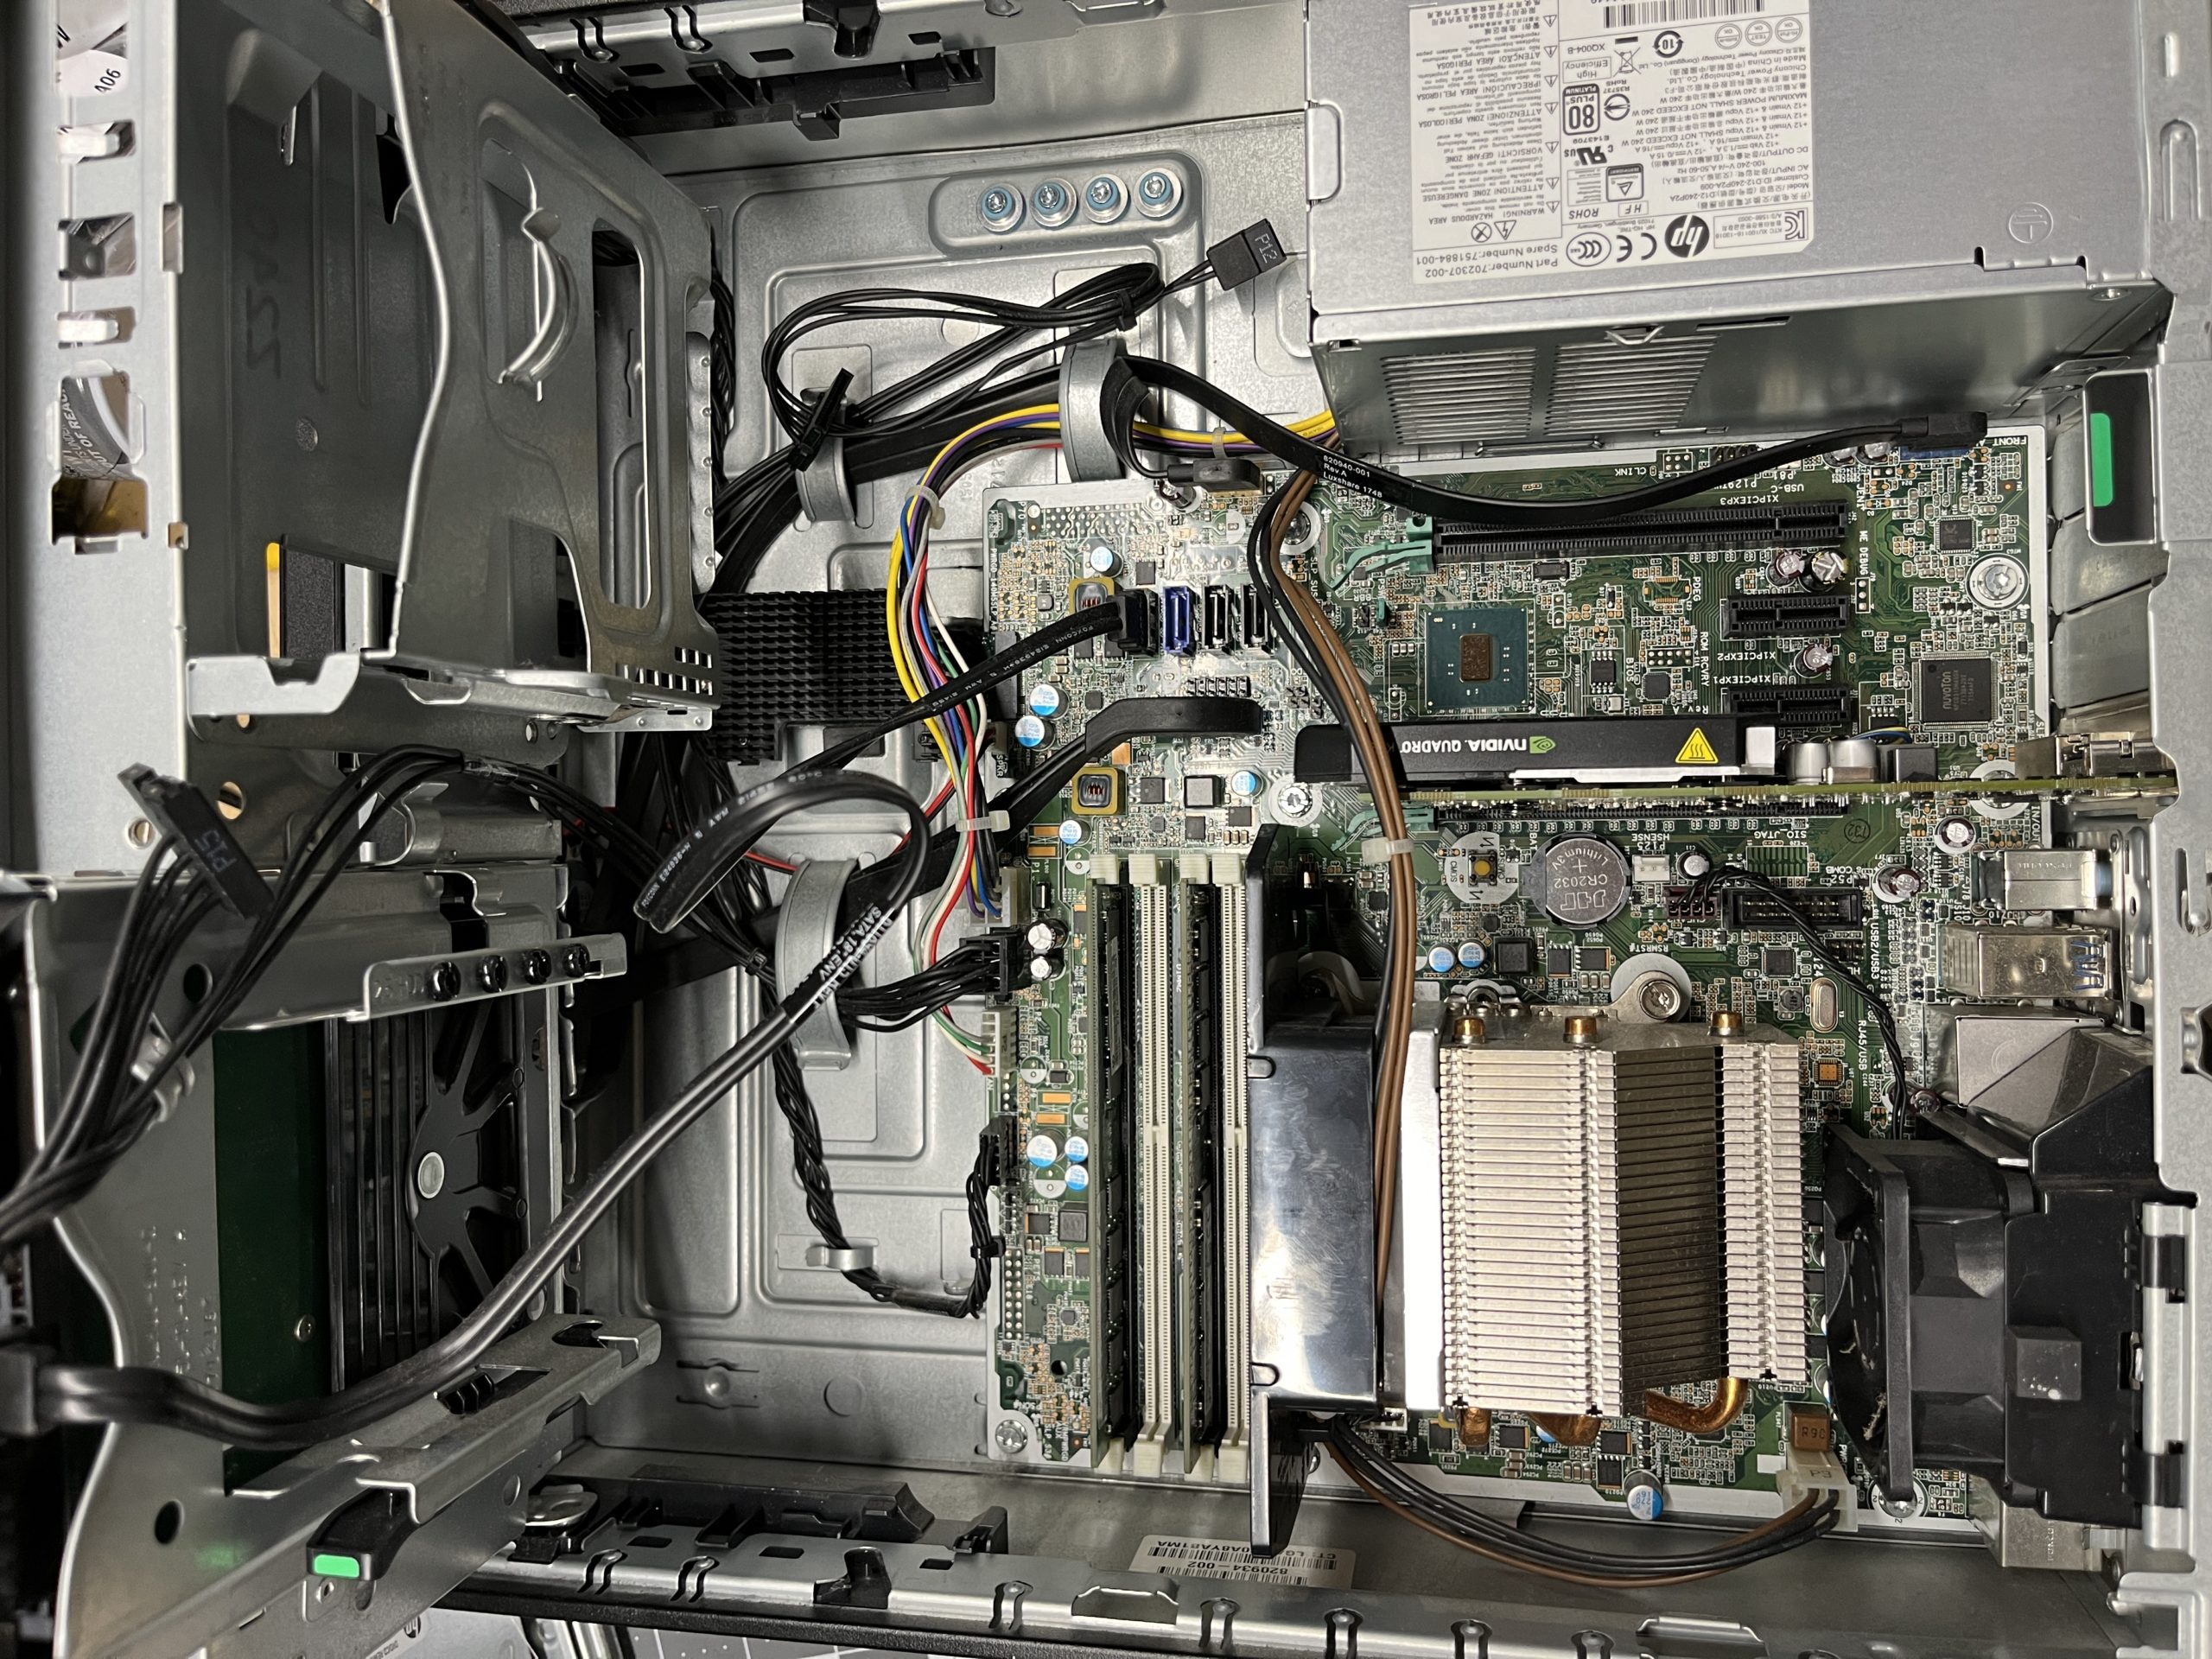
Beyond storage, the Z240 SFF provides several expansion options:
- 1 full-height PCIe x16 slot (typically used for graphics)
- 1 full-height PCIe x4 slot (electrically x1)
- 1 full-height PCIe x1 slot
- 1 full-height PCI legacy slot
This expansion capability allows for adding:
- 10GbE network cards for high-speed networking
- HBAs (Host Bus Adapters) for connecting external storage
- GPU accelerators for compute workloads (with power supply considerations)
- Specialized I/O cards for specific applications
Power Efficiency Considerations: The Hidden Cost Advantage
All of my HP Z240 units come with 240W power supplies, which might seem limiting at first glance. However, in practice, this power envelope is more than adequate for typical homelab workloads. The Skylake processors in these machines are substantially more power-efficient than older generations, contributing to lower operational costs over the life of your homelab.
Let’s break down the power consumption characteristics:
Power Supply Efficiency
The HP Z240 SFF comes with an 80 PLUS certified power supply, typically at the Gold level for most configurations. This certification ensures that the power supply operates at 87-90% efficiency at typical loads, substantially reducing wasted energy compared to older or lower-quality PSUs that might operate at 70-75% efficiency.
Processor TDP and Actual Consumption
The Intel Core i7-6700 has a TDP (Thermal Design Power) of 65W, while the Xeon E3-1245 v5 has a TDP of 80W. However, TDP doesn’t tell the whole story:
- At idle, these processors typically consume 10-15W
- Under moderate loads (30-40% utilization), power draw is usually 25-35W
- Only under sustained, intensive workloads will they approach their rated TDP
In my real-world testing with typical homelab workloads (running several containers with moderate activity), the entire Z240 SFF system typically draws 35-50W from the wall. This is remarkably efficient for the computing power provided.
Comparison to Older Systems
During controlled testing, I’ve found the HP Z240s consume approximately 20-25% less power under equivalent loads compared to my Dell Optiplex 9010 systems with i7-3770 processors. For a 24/7 operation, this efficiency difference translates to tangible savings:
- Assuming a 20W difference at average load
- Running 24/7/365 = 8,760 hours per year
- 20W × 8,760 hours = 175.2 kWh saved per year, per machine
- At $0.15/kWh (US average), that’s about $26 saved annually per machine
- For my five-machine cluster, that’s $130 per year in electricity savings
While these savings might not seem enormous, they compound over the 3-5 year expected service life of a homelab setup, not to mention the reduced cooling requirements and lower environmental impact.
Thermal Design and Noise Considerations
The power efficiency of these systems also contributes to a better thermal profile and quieter operation. The Z240 features a sophisticated cooling system with:
- Variable-speed fans that adjust based on thermal load
- Optimized airflow channels through the compact chassis
- Effective heat dissipation even in the confined SFF design
In my experience, the Z240 systems maintain a whisper-quiet operation under typical homelab workloads, only spinning up fans noticeably during heavy computational tasks. This makes them suitable for placement in living spaces where noise could be a concern.
HP Z240 vs. Dell OptiPlex: Detailed Comparison
To help illustrate why the HP Z240 represents such a compelling value proposition for homelab use, here’s a detailed comparison with popular Dell OptiPlex models often found on the secondary market:
| Feature | HP Z240 SFF | Dell OptiPlex 9010 SFF | Dell OptiPlex 9020 SFF | Dell OptiPlex 7010 SFF | Dell OptiPlex 7020 SFF |
|---|---|---|---|---|---|
| Release Year | 2015-2016 | 2012-2013 | 2013-2014 | 2012-2013 | 2013-2014 |
| CPU Generation | 6th Gen (Skylake) | 3rd Gen (Ivy Bridge) | 4th Gen (Haswell) | 3rd Gen (Ivy Bridge) | 4th Gen (Haswell) |
| Top CPU Option | i7-6700 or Xeon E3-1245 v5 | i7-3770 | i7-4790 | i7-3770 | i7-4790 |
| Max Memory | 64GB DDR4 | 32GB DDR3 | 32GB DDR3 | 32GB DDR3 | 32GB DDR3 |
| Memory Type | DDR4-2133 | DDR3-1600 | DDR3-1600 | DDR3-1600 | DDR3-1600 |
| Memory Slots | 4 | 4 | 4 | 4 | 4 |
| NVMe Support | Yes (native) | No | No | No | No |
| NVMe Adapter | Yes (official HP) | No | No | No | No |
| SATA Ports | 4 | 4 | 4 | 4 | 4 |
| Drive Bays | 3-4 (2.5″) + 1-2 (3.5″) | 2-3 (mixed) | 2-3 (mixed) | 2-3 (mixed) | 2-3 (mixed) |
| PCIe Slots | 1×16, 1×4, 1×1, 1×PCI | 1×16, 3×1 | 1×16, 3×1 | 1×16, 3×1 | 1×16, 3×1 |
| USB 3.0 Ports | 6-8 | 4 | 6 | 4 | 6 |
| Power Supply | 240W | 240W | 255W | 240W | 255W |
| Display Outputs | DP, DVI, VGA | DP, DVI, VGA | DP, DVI, VGA | DP, DVI, VGA | DP, DVI, VGA |
| Pre-boot Display | All outputs | Limited on DP | Limited on DP | Limited on DP | Limited on DP |
| TPM Security | TPM.2.0 | TPM 1.2 | TPM 1.2 | TPM 1.2 | TPM 1.2 |
| ECC Memory Option | Yes (with Xeon) | No | No | No | No |
| Typical Used Price (2025) | $80-250 | $80-150 | $100-180 | $70-130 | $90-160 |
As this comparison illustrates, the HP Z240 SFF offers substantial advantages over its Dell counterparts, particularly in terms of:
- Newer CPU architecture with better performance and efficiency
- Double the maximum memory capacity (64GB vs. 32GB)
- DDR4 memory with higher bandwidth and lower power consumption
- Native NVMe support for dramatically faster storage
- ECC memory support with Xeon processor options
- Better display handling for headless server operation
While the HP Z240 typically commands a slightly higher price on the secondary market, the performance, efficiency, and feature advantages more than justify the premium for homelab use.
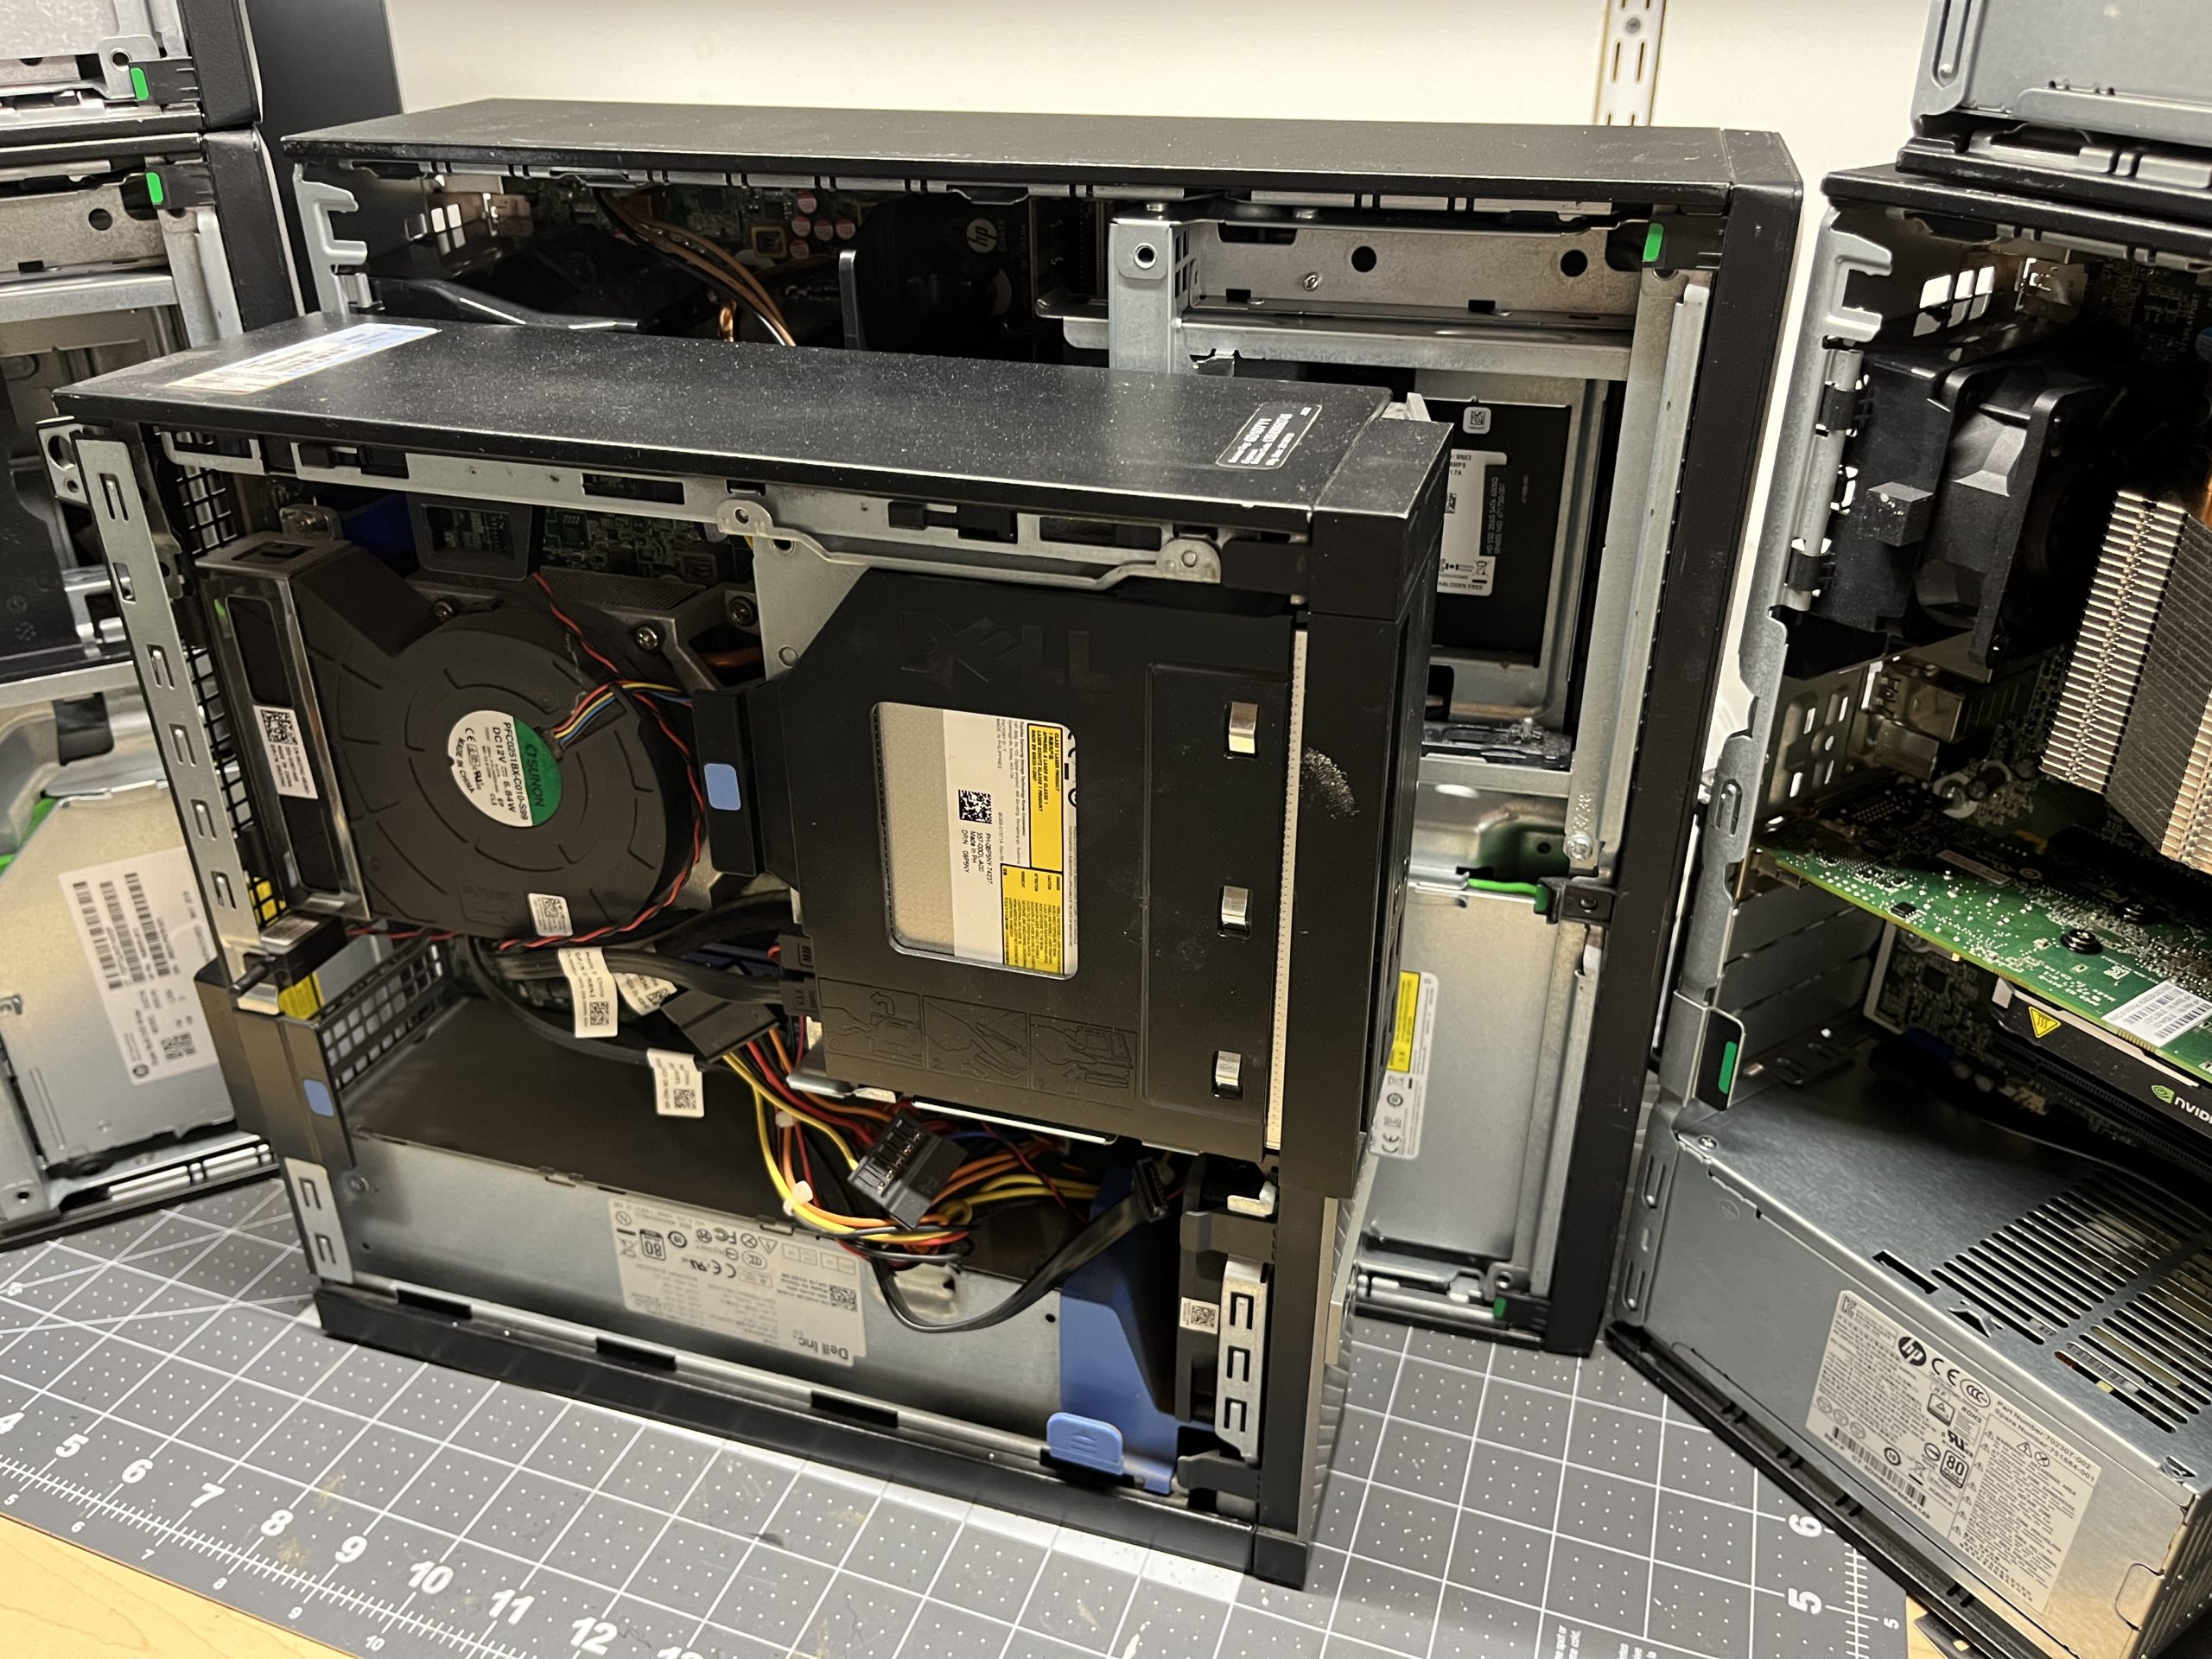
On the downside, the HP Z240 is considerably larger than the Dell SFF sizes. This came as a surprise as the fitting in my network rack became much tighter!
Building Your Kubernetes Cluster with HP Z240s
For those interested in setting up a Kubernetes or Docker Swarm cluster with these machines, here are some practical tips based on my experience building my own 5-node cluster:
Operating System Considerations
For Kubernetes deployments, I recommend:
- Ubuntu Server 22.04 LTS: Excellent balance of compatibility, performance, and long-term support
- Rocky Linux 9: A stable, enterprise-grade CentOS replacement
- Debian 12: Extremely stable with lower resource overhead
If you’re new to Kubernetes, Ubuntu Server provides the most straightforward experience with the best community support and documentation.
Cluster Architecture
With five HP Z240 systems, I recommend the following architecture:
- 1-3 Control Plane Nodes: Running etcd, API server, controller manager, and scheduler
- 2-4 Worker Nodes: Running your actual workloads
- Load Balancer: Either a dedicated instance or as a service on your nodes
For smaller deployments (3 machines or fewer), you can use a single control plane node, but for production-like learning environments, a three-node control plane provides valuable experience with high-availability configurations.
Network Configuration
The onboard Intel Gigabit Ethernet in the HP Z240 is reliable and more than adequate for most homelab needs. For my cluster, I’ve implemented:
- Dedicated subnet: 192.168.100.0/24 for all Kubernetes traffic
- Fixed IP assignments: Based on MAC address reservation in my router
- Internal load balancer: Using MetalLB to provide service LoadBalancer support
- CNI: Calico for network policy support and performance
If you require faster networking for specific workloads, the PCIe slots can accommodate 10GbE cards, but for most home Kubernetes learning and experimentation, the built-in Gigabit Ethernet is perfectly sufficient.
Storage Layout
I’ve found the following storage configuration works well for Kubernetes nodes:
- OS and Kubernetes components: 256GB+ NVMe drive
/(root): 50GB/var: 100GB+ (for container images and logs)- Remainder for local persistent volumes if needed
- Container Persistent Storage:
- SATA SSDs (500GB-2TB) for performance-sensitive applications
- HDDs (2TB+) for capacity-oriented storage like backups or media
For dynamic provisioning of persistent volumes, consider:
- Longhorn: Distributed block storage across your cluster
- OpenEBS: Similar capabilities with different architecture
- NFS: Simplest option if you have an existing NAS
Memory Allocation
With 32GB or more RAM per node, allocate your memory carefully:
- Control Plane Nodes:
- Reserve 4-6GB for the operating system
- Allocate 8-12GB for Kubernetes control plane components
- Remainder available for monitoring, logging, and support services
- Worker Nodes:
- Reserve 4GB for the operating system
- Allocate 2-4GB for Kubernetes node components
- Remainder available for application workloads
For nodes with 64GB RAM, you can comfortably run 10-15 moderate-sized containerized applications per worker node.
CPU Resource Management
The 4-core/8-thread configuration of the i7-6700 or Xeon E3-1245 v5 provides excellent multi-tasking capability:
- Control Plane Nodes:
- Reserve 1 core/2 threads for system operations
- etcd is sensitive to CPU scheduling – consider dedicated threads
- Use CPU limits and requests to prevent control plane components from starving each other
- Worker Nodes:
- Reserve 0.5 core/1 thread for system operations
- Use CPU limits and requests to prevent resource contention
- Consider CPU topology for performance-critical applications
Unleashing the HP Z240’s Potential: Software Configuration
To get the most out of your Z240-based homelab, here are some software configurations I’ve found to work particularly well:
Virtualization Options
The Z240’s Intel processors support VT-x and VT-d virtualization extensions, enabling several virtualization approaches:
- Type 1 Hypervisors (Bare Metal):
- Proxmox VE: Excellent free option with a robust web interface
- ESXi: Enterprise-grade but requires licensing for advanced features
- Hyper-V Server: Good option for Windows-centric environments
- Type 2 Hypervisors (OS-Hosted):
- VirtualBox: Simple, cross-platform option for desktop virtualization
- KVM/QEMU: Native Linux virtualization with near-native performance
- Container Platforms:
- Docker: Simplest entry point for containerization
- Podman: Daemonless alternative to Docker
- LXD: Lightweight system containers
For my cluster, I’ve chosen to run Ubuntu Server with KVM as the virtualization layer, and Kubernetes deployed across this infrastructure. This combination provides flexibility to run both traditional VMs and containerized workloads as needed.
Performance Tuning
To extract maximum performance from these systems:
- BIOS Configuration:
- Update to the latest available BIOS (typically N52 Ver.02.57 or newer)
- Enable virtualization extensions (VT-x and VT-d)
- Configure RAM for optimal performance (XMP if available)
- Adjust fan profiles for your noise/cooling preferences
- OS-Level Tuning:
- Use the
performanceCPU governor for consistent performance - Enable transparent huge pages for virtualization workloads
- Configure swappiness appropriately (I recommend 10-20 for server use)
- Use deadline or mq-deadline I/O scheduler for NVMe drives
- Use the
- Filesystem Considerations:
- For containers and VMs: Use XFS for better performance with many small files
- For large media: ext4 offers good general-purpose performance
- Consider ZFS if you need advanced features like snapshots and compression
- Network Stack Optimization:
- Increase network buffer sizes for better throughput
- Enable jumbo frames if your network supports them
- Use ethtool to optimize NIC settings for server workloads
Monitoring and Management
To effectively monitor your Z240 cluster:
- Hardware Monitoring:
- Install lm-sensors to track temperatures and fan speeds
- Use smartctl (smartmontools) to monitor drive health
- Consider a centralized monitoring solution like Prometheus + Grafana
- Remote Management:
- Set up SSH with key-based authentication for secure remote access
- Configure Wake-on-LAN for remote power management
- Install a lights-out solution like Cockpit for browser-based administration
- Automation:
- Use Ansible for configuration management across your cluster
- Implement Infrastructure as Code practices from the start
- Automate routine maintenance tasks with shell scripts or Python
HP Z240 Practical Applications in a Homelab
With the power and flexibility of the Z240 SFF, there are numerous practical applications for these machines in a homelab environment:
Kubernetes Exploration and Learning
The Z240’s capabilities make it perfect for running a complete Kubernetes environment, including:
- Core Kubernetes Components:
- Full control plane (API server, controller manager, scheduler, etcd)
- Worker nodes with kubelet, kube-proxy, and container runtime
- Service mesh implementations like Istio or Linkerd
- Common Kubernetes Workloads:
- Stateless web applications
- Database services with persistent storage
- CI/CD pipelines with Jenkins, GitLab, or Tekton
- Monitoring stack with Prometheus, Grafana, and Alertmanager
- Advanced Kubernetes Features:
- Custom Resource Definitions and Operators
- Horizontal and Vertical Pod Autoscaling
- Network Policies and Pod Security Policies
- Custom admission controllers
My five-node cluster comfortably runs over 40 pods including a complete monitoring stack, several web applications, and multiple database instances.
Home Media and Storage Server
The Z240’s combination of processing power, memory capacity, and flexible storage options makes it an excellent media server platform:
- Media Server Software:
- Plex or Jellyfin for media streaming
- Sonarr/Radarr for content management
- Jackett or Prowlarr for indexing
- Storage Solutions:
- Direct-attached storage using internal bays
- Network-attached storage using Samba or NFS
- Distributed storage using GlusterFS or Ceph
- Additional Services:
- Automated backup system for personal devices
- Photo management with PhotoPrism or Immich
- Document management with Paperless-ngx
Development Environment
For software developers, the Z240 provides an excellent platform for:
- Development Tools:
- Self-hosted Git repositories with GitLab or Gitea
- CI/CD pipelines for automated testing and deployment
- Containerized development environments
- Database Development:
- Multiple database engines for testing and development
- Performance testing environments
- Database clustering and replication scenarios
- Web Application Hosting:
- Full web application stacks
- Reverse proxy with Nginx or Traefik
- SSL termination and certificate management
Home Automation and IoT Hub
The Z240’s reliability makes it a great foundation for home automation:
- Automation Platforms:
- Home Assistant for integrated smart home control
- Node-RED for visual automation workflows
- MQTT brokers for IoT device communication
- Data Collection:
- Time-series databases for sensor data
- Data visualization dashboards
- Long-term trend analysis
Common Issues and Solutions
In my experience with multiple Z240 systems, I’ve encountered a few common issues and their solutions:
HP Z240 BIOS-Related Issues
- Boot Device Not Recognized:
- Solution: Update to the latest BIOS version
- Ensure SATA mode is set correctly (AHCI vs. RAID)
- Check if secure boot is interfering with Linux installations
- Memory Not Fully Recognized:
- Solution: Ensure memory modules are seated properly
- Verify modules are in recommended slots (typically 2 and 4 first)
- Check BIOS settings for memory configuration
Hardware Limitations and Workarounds
- NVMe Compatibility:
- Issue: Not all NVMe drives are recognized in the boot menu
- Solution: Use Samsung 970 EVO/PRO or other known compatible drives
- For incompatible drives, use a boot partition on a SATA drive
- Power Supply Limitations:
- Issue: 240W PSU limits expansion options
- Solution: Prioritize low-power components
- Calculate total power draw before adding components
- Consider external powered peripherals when needed
- Cooling Considerations:
- Issue: Limited airflow in SFF chassis
- Solution: Keep chassis clean and dust-free
- Monitor temperatures during heavy workloads
- Consider repasting CPU with higher quality thermal compound
Operating System Compatibility
In my testing, the Z240 works exceptionally well with:
- Linux Distributions:
- Ubuntu 20.04/22.04 LTS: Excellent overall compatibility
- Debian 11/12: Very stable with good hardware support
- Rocky Linux/AlmaLinux: Great for CentOS-like environments
- Fedora: Good for newer kernels and features
- Windows Versions:
- Windows 10/11: Full driver support
- Windows Server 2019/2022: Excellent for Hyper-V environments
- BSD Variants:
- FreeBSD: Good support but may require some configuration
- OPNsense/pfSense: Excellent for networking applications
Sourcing and Upgrading Tips
If you’re looking to acquire HP Z240 systems for your own homelab, here are some practical tips based on my experience:
Where to Find HP Z240 Systems
- eBay: The most common source, with a wide range of configurations
- Corporate IT liquidators: Often sell batches at good prices
- Government/education surplus auctions: Excellent value but irregular availability
- Local classified ads: Can offer great deals without shipping costs
What to Look For
- Processor: Prioritize i7-6700 or Xeon E3-1245 v5 models (avoid i3 and i5)
- Memory: Look for units with at least 16GB pre-installed
- Storage: NVMe capability is key; actual drives can be added later
- Condition: Check for physical damage, especially on cooling components
- Warranty: Some units may still have a transferable warranty remaining
Recommended Upgrades
- Memory: Upgrade to at least 32GB (2x16GB) DDR4 if not already installed
- Storage: Add a 500 GB+ NVMe drive for the OS and primary storage
- Networking: Consider 10GbE cards if you have compatible infrastructure
- Additional Storage: Add SATA SSDs for secondary storage tiers
Accessories Worth Acquiring
- NVMe Caddy: The HP 826414-001 caddy/heatsink is essential for NVMe drives
- PCIe NVMe Adapter: HP 742006-002 for additional NVMe capacity
- Drive Adapters: 2.5″ to 3.5″ adapters for mounting SSDs
- Dust Filters: Aftermarket filters to protect internal components
Value Proposition: The Cost-Benefit Analysis
To properly evaluate the Z240 SFF as a homelab platform, let’s break down the total cost of ownership compared to alternatives:
Initial Acquisition Cost
Based on early 2025 market prices:
- HP Z240 SFF with i7-6700, 16GB RAM: $150-200
- Comparable new mini PC: $500-700
- Cloud equivalent (4 cores, 16GB RAM): $80-120/month
For my five-node cluster, the total acquisition cost was approximately $700, versus $2,500+ for equivalent new hardware or $400-600/month for cloud resources.
Ongoing Costs
- Power Consumption:
- Z240 SFF: ~40W average × 5 units = 200W
- At $0.15/kWh: ~$260/year for the entire cluster
- Maintenance:
- Minimal if purchased in good condition
- Occasional fan cleaning
- Potential drive replacements every 3-5 years
- Space Requirements:
- Each unit is approximately 13.3″ × 4″ × 15″ (HWD)
- Can be stacked vertically to minimize footprint
Return on Investment
The Z240 cluster reaches break-even against cloud alternatives in just 2-3 months of operation, making it an extremely cost-effective solution for:
- Learning and Skill Development: Hands-on experience with enterprise technologies
- 24/7 Services: Running personal services without recurring costs
- Performance: Local resources without latency or bandwidth constraints
- Privacy: Complete control over your data and services
Conclusion: Why the HP Z240 SFF Stands Out
After months of running my Z240 SFF cluster, I am convinced that these machines represent one of the best possible values in home lab computing today. They strike an almost perfect balance between:
- Performance: Sufficient for all but the most demanding workloads
- Reliability: Enterprise-grade components built for 24/7 operation
- Efficiency: Reasonable power consumption for the capability provided
- Expandability: Flexible storage and memory options
- Cost: Affordable acquisition and operation costs
For homelab enthusiasts looking to build a Kubernetes cluster, Docker Swarm environment, or general-purpose compute farm, these systems provide enterprise-grade capabilities without the enterprise-grade price tag. Their compact form factor, energy efficiency, and expansion options make them suitable for a wide range of applications, from development and testing to media servers and small business workloads.
The HP Z240 SFF represents that rare sweet spot where previous-generation enterprise hardware offers capabilities that exceed most homelab requirements, at a price point that makes owning multiple units practical. As these systems continue to exit corporate refresh cycles and enter the secondary market, they present an exceptional opportunity for homelab builders to create professional-grade environments on hobbyist budgets.
Have you built a homelab with HP Z240s or similar hardware? I’d love to hear about your experiences in the comments!
Note: I’ll be adding photos of my actual Z240 cluster setup in a future update to this post, showing the physical arrangement, cooling solutions, and cable management approaches I’ve implemented.
Leave a Reply